Posts

Whimsy Stamps 31 Nights of Halloween Celebration - Franken Monster Birthday
Image
Hi everyone! I am back today with my second creation for Whimsy's  31 Nights of Halloween celebration over at the Whimsy Inspirations Blog ! There is still time to participate in our games to have the chance of winning some spooktacular prizes! Make sure you don't miss this! This time I have a birthday card to share using the awesome  'Franken Schmutz'  clear set by Deb Davis. I love this Franken monster, he is so cute. I also like that this set can be used for a variety of cards, it really is versatile! I decided to go with blue and violet colors and also include a little shaker circle. The background was made using Distress inks/crayons in tumbled glass, shaded lilac, wilted violet and seedless preserves. First I applied a color wash with Distress inks and let it dry. Then I used a Tim Holtz stencil (Bubble) and Distress Crayons to add some texture to my background. Some spritzers of water finish off the background. All the elements were stamped ...

Let it Snow

Image
Happy Sunday Everyone! I am here today to share a clean and simple card using the Whimsy Snow Word & Snow Caps die set  and the Snow Flurry clear set both designed by  Deb Davis . I sponged a white panel of cardstock with different blues of Distress Oxide Inks. I then stamped some Snowflakes from the  Snow Flurry   clear set with Versamark ink onto the sponged card panel and embossed them with white and silver embossing powder. I also stamped some snowflakes in dark blue for a nice contrast. Using the word die from the  Whimsy Snow Word & Snow Caps die set  I cut out the word snow from my already inked and embossed panel. I also cut out the word snow from a sheet of white fun foam. I adhered the snowflake panel to my card front. Filling the die cut letters with the matching fun foam die cuts and on top of the fun foam I glued the die cut letters from the snowflake panel. Make sure the snowflakes line up nicely. I love the effect...

Whimsy Stamps' 31 Nights of Halloween & Giveaway

Image
Welcome to Day 21 of the Whimsy Stamps Halloween Celebrations! Hope you all are having a wonderful weekend so far! It is my day today to post on the Whimsy blog with my creation for our 31 Nights of  Halloween Celebrations. I made a card where I used one of Whimsy's older Halloween Stamps. It's a Wee Stamp illustrated by Sylvia Zet and called  Batty Boo . This is one of my favorite Halloween images of all times. I think it is stinkin' cute! Who can resist these little bats with their smooshy faces? We are giving away lots of goodies during our Halloween celebration month at the Whimsy blog .   Denise is so generous and  my giveaway for you today is this beautiful  Batty Boo  stamp ! So if you would like to have these cute bats in rubbah then please leave a comment ON THE WHIMSY BLOG ON MY POST   -click here- It's that simple, nothing else to do! One comment per person! You have until 11:59pm on October 30th to enter. Th...

Santa Spinner Card & Mirror Stamping Video

Image
Hello Crafty Peeps! Today I have a card to share which was one of my projects at the Whimsy Craft Retreat earlier this month. It is a spinner card which also involves mirror stamping. It's a really fun project and Whimsy Stamps has now mirror stamps in the store to buy. This super cute image, as well as the sentiment and background image are all from the Oh What Fun clear set by Deb Davis . In the video (scroll down) you will see the image from both sides. The sprinkles around the image were created using Brusho. I also added glitter for some sparkles. On the inside I've added snow texture paste and more glitter underneath the trees as well as on top of the trees. Here is a little video on how to mirror stamp to create the image I used on my spinner card. Whimsy supplies used:                Thanks for stopping by!

Darling Daisies - watercolored

Image
Hello crafting friends! Today I want to share a card with you where I used an older Whimsy rubber stamp called Darling Daisies , from the Crissy Armstrong Collection. I used my ZIG Clean Color Brush Markers to stamp the image as well as color it. This was a new technique for me but I have to say I really do like it. I like the soft watercolor look and the 'no-lines' effect. I took the stamp and mounted it onto a stamping platform. I used my Mini Misti for that. I then colored directly onto the stamp with my ZIG pens. One color after another and stamping in-between color applications. An easy task if you use a stamping platform.  After stamping I let the image dry some what. I used a waterbrush to soften the stamped lines, added more color with my ZIG pens (i applied it directly to the paper with the ZIG pen) and colored and softened it again using the waterbrush. For the petals and the stems/leaves I used the lighter color to stamp and darker color to add some m...

Support Needed! - Whimsy Stamps Special Hurricane Irma Relief Set!

Image
Hello crafty friends!  Please join us to support the disaster relief efforts underway in Southwest Florida in the aftermath of Hurricane Irma. Purchase the special  Helping Hands clear stamp set illusrated by Whimsy illustrator  and Florida native Deb Davis.  The set will be on sale from  now through December 31st, 2017 and Whimsy Stamps will generously   donate ALL proceeds from the sale of each set to our local Southwest Florida charities to aide in disaster relief efforts. This set is available to purchase as a pre-order now for $14US and will begin shipping in mid October. Here is a card I made using this special set The background was made using Brusho powders and it actually matches the card base pretty well. It just looks different in the photo. I've added some sequins to embellish the card and Stickles for some bling. Thanks for stopping by

Whimsy September Release Countdown Day 5

Image
Hi Crafty Peeps! We've made it to Day 5 of our Whimsy September release countdown week where we will be showing you the last of the new goodies available in just 2 days. Syliva Zet has an adorable image in her Wee Stamps line, Wishlist.   We are finishing off the clear lineup with last month's CAS set which will now be available for purchase, Just Dance. It also has coordinating dies available.  We are also showing you the newest CAS set that can be earned for free with a $75 minimum purchase - Meowy Kittymas. Here is my sneak peek for today using the adorable Wishlist from Wee stamps! He will be available in rubber on Thursday! I colored him with Copics. The background was done using the Copic airbrush system and a Tim Holtz stencil. The die is from the NEW Winter Wonderland Word dies also available Thursday! List of Copics used: Skin: E000, E00, E21, E11 Hair: E29, E25, E21 Red: R12, R22, R24, R29 Green: G40, G43, G4...

Whimsy September Release Countdown Day 4

Image
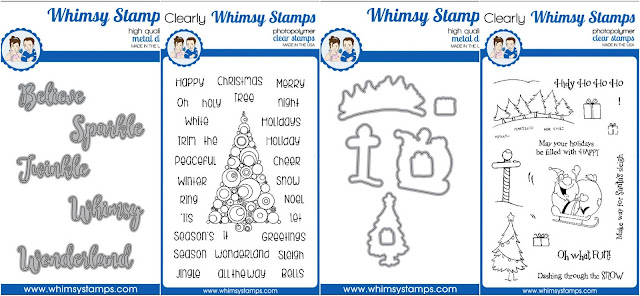
Hey Y'all! We are one day closer to the September release and for our clear line, we have Abstract Christmas, Oh What Fun with its coordinating dies and the Winter Wonderland Word dies to share today. Our rubber artist featured today is Crissy Armstrong. You all love her sweet penguin images and she has more for you this month along with some others. We have Penguin Sweetheart, Penguin Warm Winter Wishes, Christmas Deer, Christmas Elf and Fleece Navidad. Here is my inspiration for today - Abstract Christmas: The background was created using an acrylic block and Distress inks. I just smooshed on the different color inks on the block, spritzt it with a water mister and stamped it onto a panel of watercolor paper. I stamped the tree using Versamagic ink and heat embossed with gold glitter embossing powder. This is really shiny and sparkly, unfortunately hard to capture in the photo. I stamped several sentiments from the set next to the tree and added ...

Whimsy Stamps September Release Countdown - Day 3

Image
Welcome to more sneak peeks on day 3 of the Whimsy  September Release Countdown! You've seen lots of fun new goodies already but there's plenty more to come :-D Today's featured rubber artist is Lee Holland.  Snowflake Penguin and Snowman's Sled Ride are perfect for the upcoming winter months. In our clear lineup, we are featuring the gorgeous Christmas Memories stamp set and the Christmas Branch dies. This is also what I used today for my inspirational creation. I made two vintage Christmas tags: I cut out tags from kraft cardstock as well as from vintage style designer papers. I stamped the images and sentiments from the Christmas Memories set onto the DP tags using Versafine sepia ink and distressed the edges with Brushed Corduroy Distress Ink. I adhered the DP panels onto the cardstock tags. Then I cut out branches from cardstock using the Christmas Branch dies. I also used some leftover cutouts from a stencil I made with thes...